Contributing to the Project
The current focus is to get as many hymns published as possible. In the future, we will want to annotate them with fingering and pedal markings. If you are interesting in helping with this, let me know.
Most of the work of converting hymns to three-staff notation has been done by a computer program I wrote. This computer program converts the MusicXML-like JSON file consumed by the Church Music Library website to a MusicXML file that MuseScore can consume. Unfortunately, styling doesn't quite make it through and some of the conversion needs cleaning up. This is where you can help. You'll need to be familiar with MuseScore.
For each hymn that hasn't been converted yet, a contributor will:
- Import the MusicXML file into MuseScore.
- Apply the styling instructions below.
- Save the updates as a MuseScore file, and export it as a PDF.
- Email me the MuseScore and PDF files.
This process takes anywhere from five to 10 minutes for most hymns, to a full hour for some harder hymns. The instructions below make it look daunting, but it's usually not that hard once you get the hang of it. If you encounter a hymn that's too difficult, let someone else do it; there is no shame in it.
Requirements
Here is a list of what you will need in order to contribute:
- Computer with MuseScore software (runs on Windows, Mac, and Linux).
- The latest version of the MuseScore hymns style file (click to download). Save this file in your MuseScore's Styles folder for fastest access.
- Access to email.
To get started, download the full MusicXML hymn collection.
Styling Instructions
These instructions are for MuseScore Studio 4.7. (Demonstration video coming soon....) You should have the PDF or hymnbook with you as a reference to match it as closely as possible.
- From the MuseScore Home tab, click on Open other... on the bottom-right corner of the window. Open the desired MusicXML file.
- Apply the hymns style by selecting Format → Load Style and selecting the Hymns style file.
- Verify the title area:
- The hymn title should be centered, and the text size should be 20pt. (You can triple-click on it to select the text, and the formatting tools should say 20pt.
- The hymn number should be on the left, and it should also be 20pt.
- For new hymns (numbered above 1000):
- Click on the scripture references once.
- Use the up arrow on your keyboard to move the scripture references up so they sit close to the hymn title.
- Ensure the scripture references have a size of 12pt.
- Click on the dashed light-gray title box border. Drag the gray square on the bottom-center of the title box to resize the title box. Make the bottom of the box touch the bottom of the title, or the scriptural reference text for new hymns.
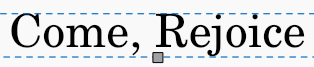
- Fix the text area at the end of the hymn (extra verses, credits, scriptures, notes):
- For hymnbook hymns (numbered 1-341):
- Select the scriptural references and move them all the way to the right. To keep them lined up to the top, use the → and ← arrow keys to line it up to the right of the dashed box container. (Using Ctrl/Command + → moves them faster.)
- Double-click the credits area and mae Text: and Music:, or Text and music: italic. Match the italics of any other text.
- If the credits are not displayed (happens more often than I would like), they are likely in the copyright property for the score:
- Click on the scriptural references once to select. (The text should appear blue but not reversed.)
- Copy the selection to the clipboard (Ctrl/Command + C or Edit → Copy from the menu) and paste it (Ctrl/Command + V or Edit → Paste from the menu).
- Triple-click on the text to select the text. Change the alignment to the left.
- Hit the Esc key to exit the text editor, and use the arrow keys to move the left-aligned scriptural references to the left. You must now have two copies of the scriptural references: one on the right, and one on the left. If you only have one reference, undo the changes and try again. This can be tricky at first.
- From the menu, select File → Project properties.... Find the text in the Copyright property, select it all and copy it. Close the Project properties dialog. (If the text is not there, you'll have to enter it manually on the next step.)
- Triple-click on the left-aligned scriptural references to select the text and paste the clipboard contents (or type it in manually if it wasn't there).
- Match the italics as outlined above.
- Select the dashed-frame border for the full bottom frame, and use the square on the bottom-center to reduce its size to the minimum required, similar to the title frame.
- For hymnbook hymns (numbered 1-341):
- For new hymns (numbered above 1000):
- Triple-click on the text at at the bottom of the hymn. Change the text size to 8pt.
- If there are multiple, overlapping text boxes, select the text for the other boxes, change the size to 8pt and insert blank lines at the to move the text down.
- Hit the ← left arrow on the keyboard to unselect the text after resizing.
- Select the Text:, Music: or Text and music: parts and make them italic. Match the italics of any other text.
- If the hymn contains a copyright:
- Get the copyright notice from the score properties by selecting File → Project properties... from the menu. Find the text in the Copyright property, and select it, and copy it. Close the Project properties dialog.
- Double-click on the credits text. Go all the way to the end and add a new line by hitting Enter/Return key.
- Paste the copyright text.
- Select the copyright text and change the font size to 7pt.
- Select the dashed-frame border for the full bottom frame, and use the square on the bottom-center to reduce its size to the minimum required, similar to the title frame.
- If the hymn contains extra verses, the extra verses on the left and the extra verses on the right are in separate but overlapping boxes. To fix the alignments:
- Click once on the overlapping verse text to select one of the columns. The text should appear in blue, but not reversed.
- Move the selected text to the left or right with the arrow keys to see where it should go. Move it to the left or right as appropriate to match the hymnbook style.
- If the text is not aligned correctly, triple-click on the selected text and align it to the left.
- Click once on the other verses and move them left or right as appropriate.
- For the credits and scriptural references, double-click them to enter text edit mode and insert blank lines at the top to move them under the extra verses. In the end, all the extra text should look close to how it appears in the hymnbook.
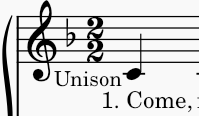
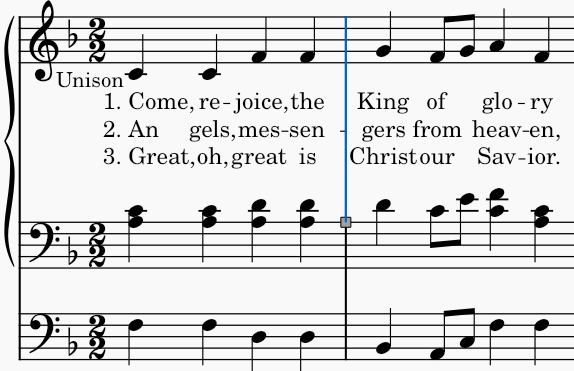
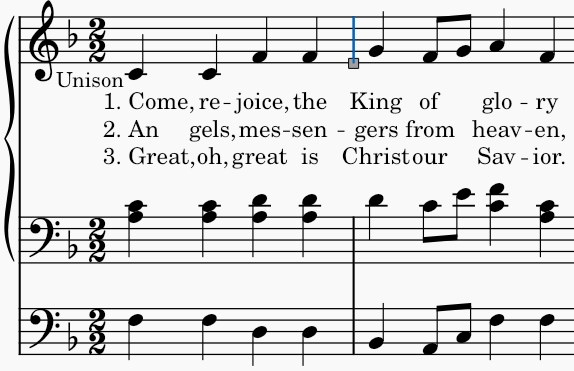
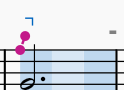
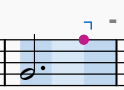
Hit the up arrow on the keyboard to remove it from the lyrics area. This matches the hymnbook style and prevents the line from getting in the way of the lyrics.
Before:
After:
- Go to the start of the hymn.
- On the top staff (melody), click on the first note to select it. It should play and appear in blue.
- Hit Shift + → on the keyboard to select all the notes in the melody until you reach the end of the line as printed in the hymnbook or hymn PDF.
- With the melody selected, select Format → Stretch → Increase layout stretch. Note that you may not see any changes as it tries to keep measures on the same line. Keep increasing the layout stretch until the section occupies the entire line. (Pro tip: Note the keyboard shortcut. For me it is } or Shift + ]. Using the keyboard is much faster.)
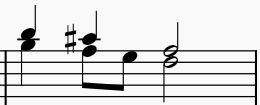
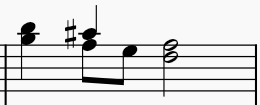
When this happens in a measure, the notes for the entire measure will be split between Voice 1 and Voice 2. Since the rhythm for both parts matches on beats 1, 3 and 4, the hymnbook (and most other music) use chords so both notes share the same stem. To turn notes on separate parts to a chord:
- Select the lower part note by clicking it. It should change color to green to show it is selected.
- In the MuseScore toolbar, select the Use Voice 1 button. (Notice Voice 2 is being used for that note.)
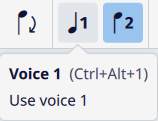
- The selected note color will change from green to blue, and the notes will share the same stem. Unfortunately, Voice 2 will now show a rest under the notes. Select the rest and hit the Delete or Backspace key to remove it.
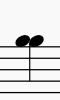
- Select one of the double notes.
- Move the note to Voice 2. It should now be fixed.
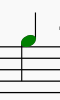
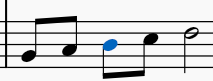
- Select the third note in the group (in blue below):
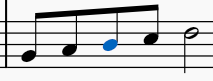
- From the Palettes tab to the left of the score, expand Beam properties.
- Select Break beam left
 .
.
- Select the note where the tie/slur will start.
- Hit T to tie the two notes, or S to add a slur. (Refer the MuseScore Handbook section on Slurs and ties for full instructions.)
Contributors
To all these individuals who have contributed, thank you from all of us:
Al Treviño (project owner)